Don't as I did, try to solder a wire to the underside of a Peco point where the frog wires are. A sticky brown mess of melted sleepers is guaranteed unless you have the touch of a plastic surgeon. Clearly, I am not thus blessed.
In a response to a question posted on the Yahoo! N Gauge Forum, I was guided to the bleeding obvious (to the initiated) answer which is to solder the wire across the two protruding rails that form the frog. Much simpler and neater, though I've had to trim the insulating fishplates if the solder spreads too far along the rail. Anyway, success. And it only cost me one medium radius point, which may be salvageable...
Thursday, 3 February 2011
Thursday, 13 January 2011
Wiring frogs, or not
Lots of questions here. Firstly, is it necessary to wire the frog of a point? Shouldn't the frog polarity be switched by the switch rail? Well, yes it should. But it didn't in two out of six cases on my so-far laid track.
In a spectacular and unprecedented exercise in forward planning, I had wired the point frogs in advance, just in case. So it's a matter of wiring them to a switch activated by the point motor.
Hmmm. I had planned to use a micro switch to drive the LED indicators on my control panel. Now I need another switch to change frog polarity. Is there a switch that can do both jobs?
Yes there is. Peco's PL15 switch does just that. But at £5 a throw it's too expensive to consider, with all the points I'll be installing (50+) over time. There is a DPDT microswitch that may work - a DPDT switch is basically two single switches changed by the same mechanical device (in this case, the point motor). I've ordered one from Maplins to test it, and then will source a cheaper version if it works in principle. (Maplins are consistently more expensive that other online sources such as All Components and Rapid.)
Wednesday, 5 January 2011
Another mistake, or when not to use PVA
All the books, all of them, say to use PVA to stick down your track, if you're not using track pins (which IMHO) look ugly. So board one track was laid, wired and tested. Trains ran! To compete a circuit I temporarily pinned some rack to the rear of the board.
Then I noticed that when the loco ran over the temporary track it was nice and quiet, but the stuck down track was noticeably loud. Of course this is actually a well-known issue with PVA, as it sets solid and transmits sound. What to do? Start again by lifting the track, or soldier on?
In the end I decided that, at this relatively early stage, it's best to do it properly, so I've lifted all laid track (sob!) and am now sticking it down with Copydex, a Latex based flexible glue. Hopefully that will work more quietly.
Monday, 3 January 2011
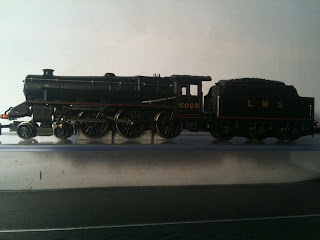
GF Black 5 - 'Tis a thing of beauty

Just had a look at my new GF Black 5. Even with my rubbish photos the detail and quality are clear. What's interesting is the comparison with an old Black 5 - they actually look like the same engine, but with more detail applied to the new version (wire hand rails, see-through wheels, etc.). But the old one won't look out of place.

Subscribe to:
Comments (Atom)


